
Little Haven DNA
Bird DNA Collection
Simple toe nail blood steps with video examples before you start.
Label baggies
Sample 1, Sample 2, Sample 3
Use the sample number from your portal only.
Do not write
Bird names, bands, colors, or breeds
Those details belong in the portal so your results still read beautifully.
Watch first
Two video examples are below
They show what the blood spot collection can look like.
No blood needed
Eggshell Method
- Let the eggshell membrane dry all the way.
- Write the sample number on the bag. Your order will show Sample 1, Sample 2, and so on. Names or bands are okay too if the sample number is clear.
- Put the dry eggshell membrane in the labeled bag.
- Use one bag for each sample.
Bird DNA sample
Toe Nail Blood Method
Use one tiny blood spot from one toe nail.
Kids: please ask a grown-up to hold the animal and use the clippers.
Items Needed
- Pet nail clippers
- Rubbing alcohol
- Paper towel
- Coffee filter, plain paper, or Q-tip
- Small bags, one per sample, labeled Sample 1, Sample 2, etc.
- Your sample numbers from your portal
- Corn starch or styptic powder
- A helper, if needed
Watch first
Video examples for collecting a blood spot
These are here if seeing the process once makes it feel less stressful.
- Write the sample number on the bag. Your order will show Sample 1, Sample 2, and so on. You may add bird names, band colors, or bird IDs too, but the sample number must be clear.
- Cut a small piece of coffee filter or paper. Hold the big end. Do not touch the tip where the blood will go.
- Keep bird DNA away. Human DNA is safe. Bird DNA is not. Bird DNA gets everywhere. One tiny bit of female bird DNA can make the results look female.
- Clean the clippers. Use rubbing alcohol. Let the clippers dry. Repeat this between each bird.
- Clean the bird's toe very well. Use rubbing alcohol. Feet can have poop, dirt, and DNA from other birds.
- Hold the bird gently. Do not squeeze the chest. Birds need their chest to breathe.
- Clip one toe nail a little too short. Clip a tiny bit and gently squeeze. If there is no blood, clip a tiny bit again. I only need a tiny dot of blood.
- Touch the paper tip to the blood. Let the blood soak into the paper.
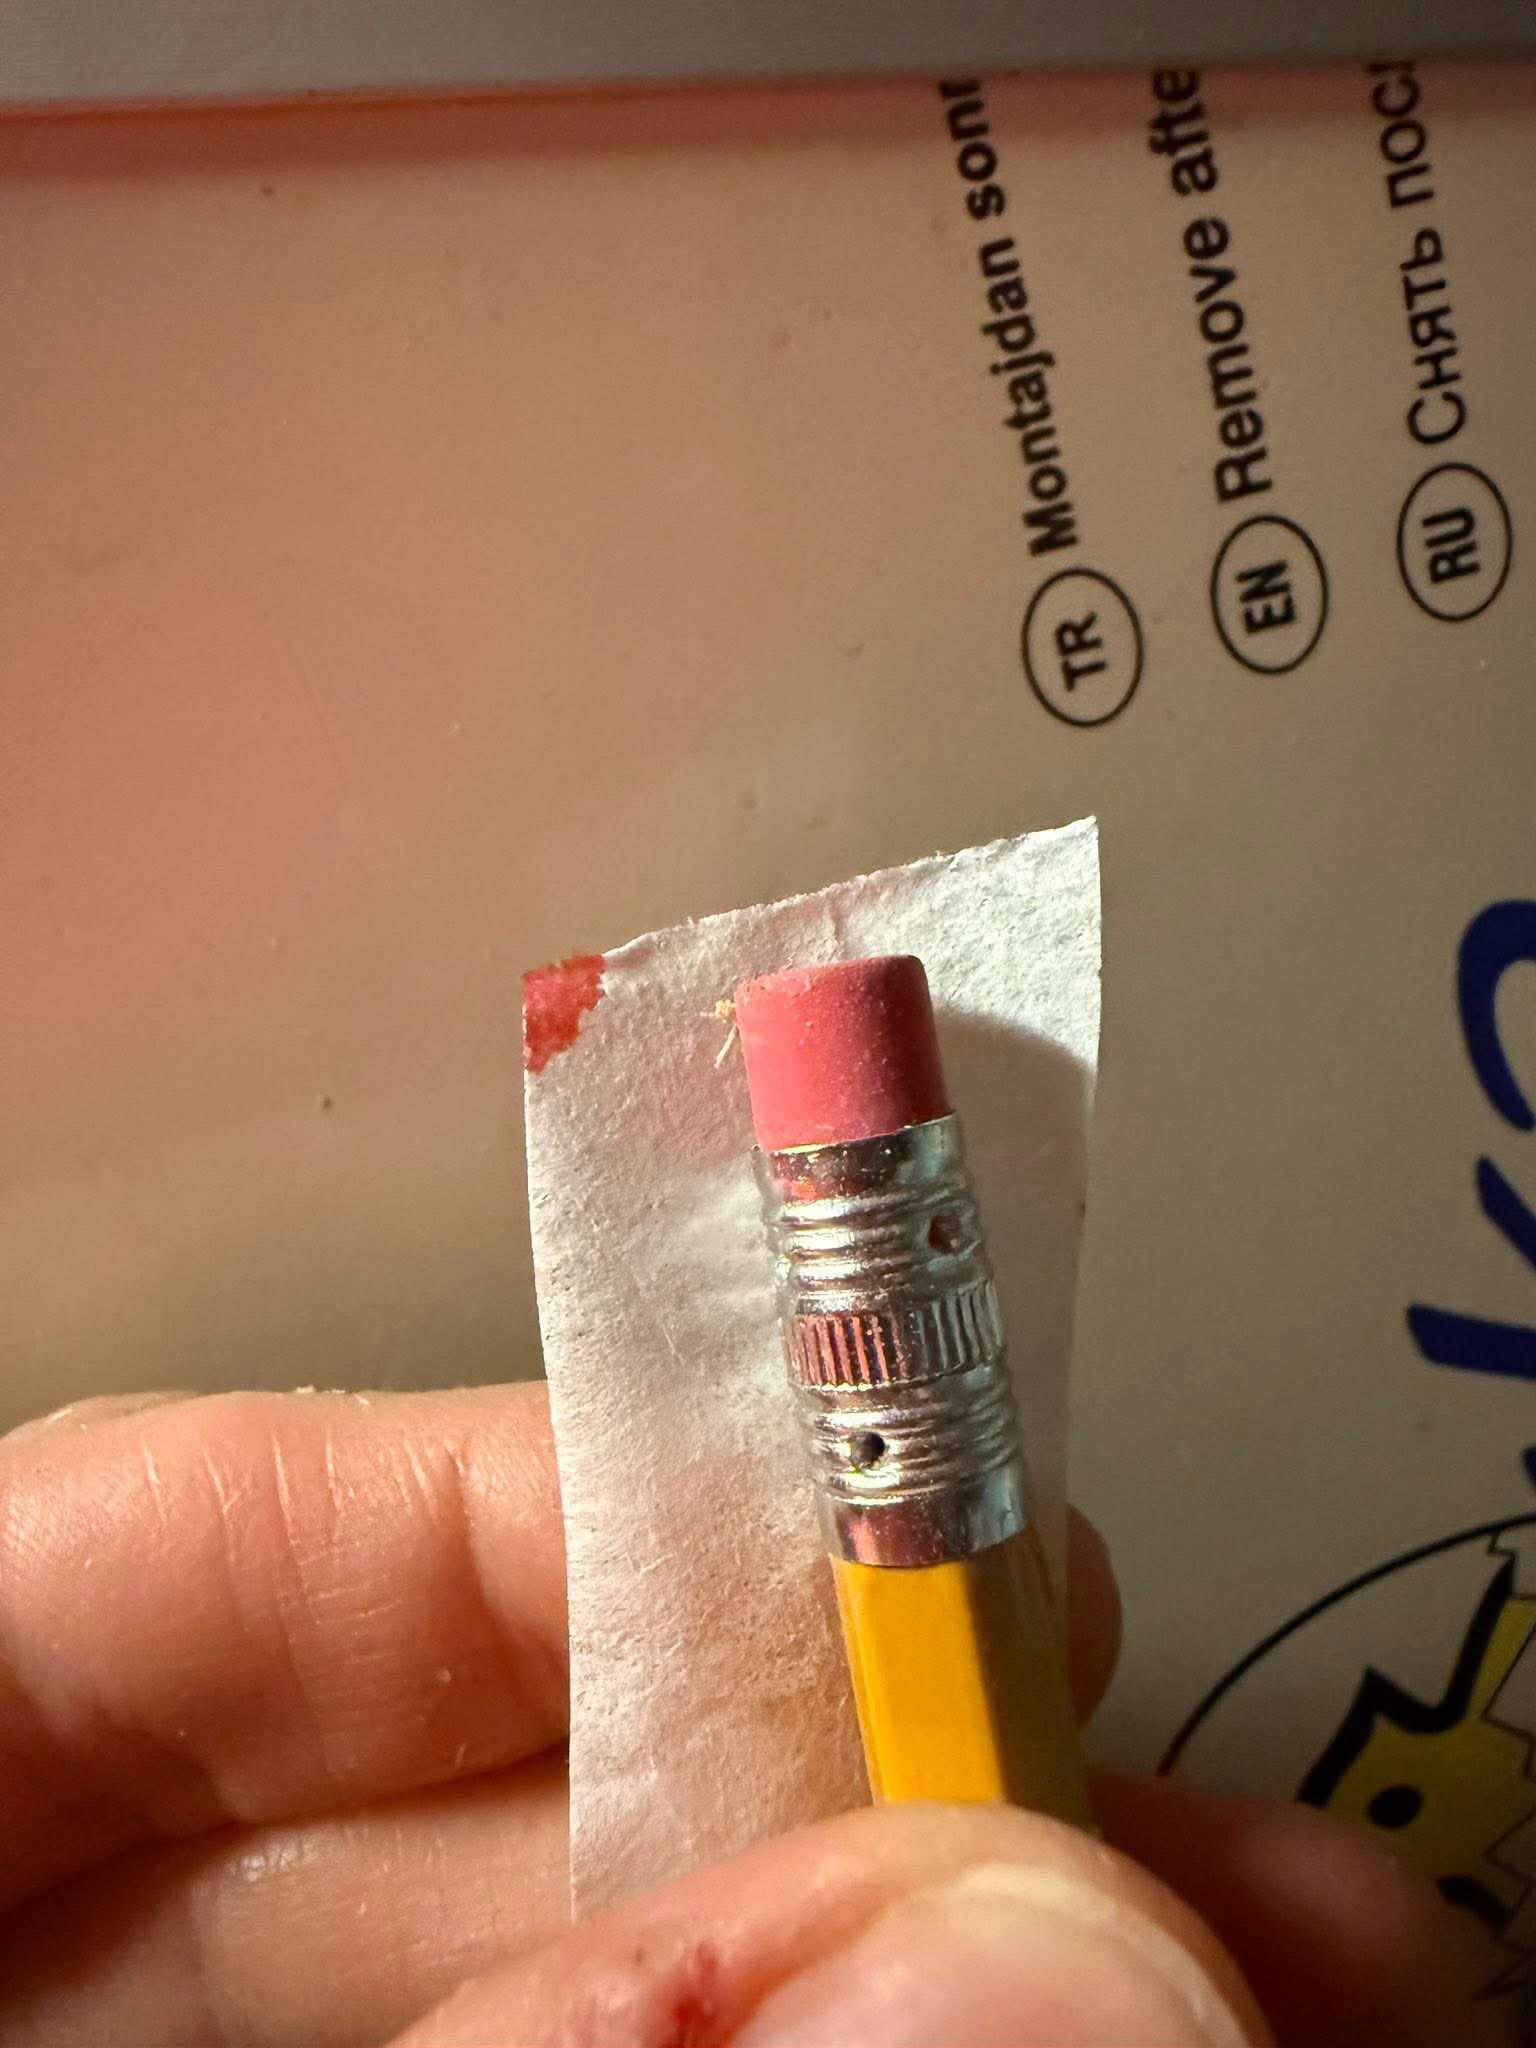
Blood amount
I need at least this much.
I do not need a lot of blood, but I need at least this much. Not a tiny smear. Not a faint mark. Make the spot easy to see.
- Stop the bleeding. Use corn starch or styptic powder if needed. This is usually more needed for adult birds or older chicks. Younger chicks usually stop bleeding easier.
- Let the sample dry. Do not put wet paper in the bag. It can get moldy and may not give results.
- Put the dry sample in the bag. One bird sample per bag. This helps avoid cross contamination.
- Clean before the next bird. Clean the clippers with alcohol again. Use new paper. Use a new bag.
- Wash hands if needed. Wash if there is blood on your hands so blood does not mix between birds.